Master Homemade Dilly Bars: Achieve the Perfect Coating Every Time
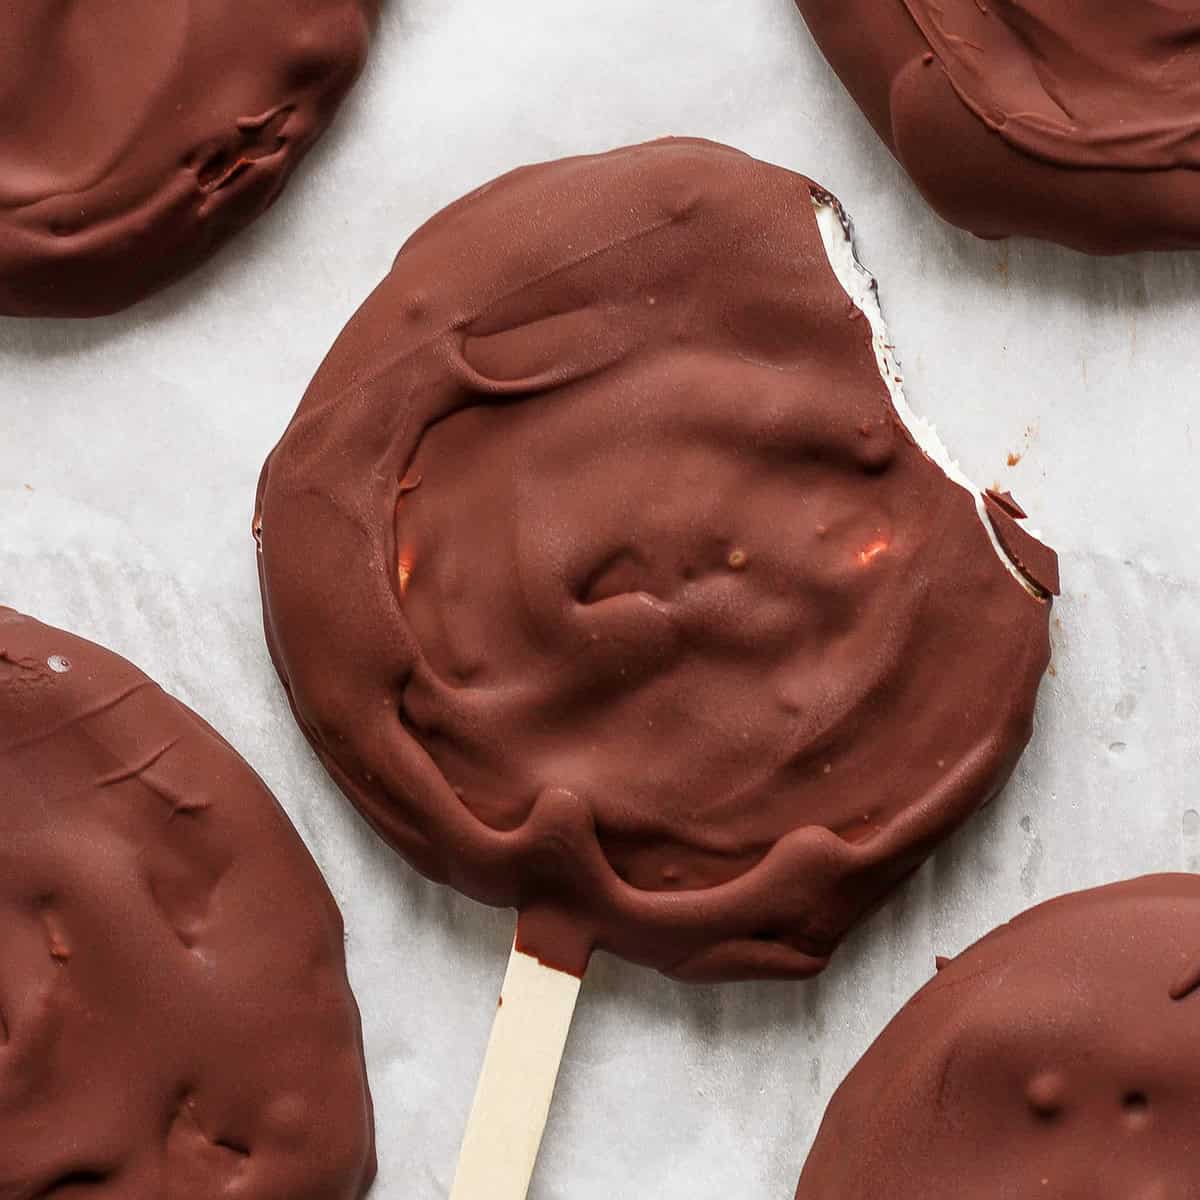
There's a special kind of magic in a Dilly Bar – that perfect symphony of creamy vanilla ice cream encased in a crisp, sweet, and oh-so-satisfying chocolate shell. For many, it's a nostalgic taste of childhood summers and Dairy Queen visits. But what if you could recreate that magic at home, with complete control over flavors and ingredients? Crafting your own
homemade dilly bars is not just possible; it's a rewarding culinary adventure, especially when you master the art of the flawless coating.
Forget the sweltering heat of Arizona or any other sunny locale; the craving for a refreshing, hand-dipped ice cream bar is universal. We've all dreamt of replicating that iconic Dairy Queen experience. The good news is, with a little patience and the right techniques, you can whip up a batch of delicious homemade dilly bars that will rival the original, complete with that signature snap. This guide will walk you through everything you need to know, with a special focus on achieving that coveted, perfectly coated finish.
Why Embrace the Joy of Homemade Dilly Bars?
Beyond pure deliciousness, making your own
homemade dilly bars offers a plethora of benefits and immense satisfaction.
*
Nostalgia and Customization: Remember those childhood trips to Dairy Queen? Replicating that experience at home allows you to not only relive those memories but also put your own spin on a classic. You control the quality of ingredients, from premium vanilla bean ice cream to your favorite chocolate chips.
*
Flavor Freedom: While Dairy Queen offers its beloved trio of chocolate, cherry, and butterscotch, making them at home unlocks a world of flavor possibilities. You can experiment with different chocolate varieties, add unique extracts to your coating, or even create entirely new combinations. The simple availability of cherry chips at a supermarket can spark dreams of recreating the less common, yet equally adored, cherry Dilly Bar.
*
Healthier Alternatives: For those mindful of sugar intake or dietary restrictions, homemade is the way to go. You can easily adapt recipes to be lower in sugar or higher in protein, using bases like Greek yogurt and natural sweeteners. This flexibility is a huge advantage, allowing you to enjoy a beloved treat without compromise. For an in-depth look at crafting lighter versions, explore our guide on
Healthy Homemade Dilly Bars: Low Sugar, High Protein Recipe.
*
Family Fun: It's a fantastic project for a warm day, engaging kids (and adults!) in the process of creating a frozen delight. From scooping ice cream to the exciting moment of dipping, it’s an activity that promises delicious rewards.
Crafting the Perfect Ice Cream Core
The foundation of any great Dilly Bar is a solid, creamy ice cream core. While vanilla is the traditional choice, don't shy away from experimenting once you've mastered the basics.
1.
Choose Your Ice Cream: Start with good quality vanilla ice cream. The creamier the ice cream, the better the mouthfeel, but it also needs to be firm enough to hold its shape.
2.
Initial Hardening: Spoon your chosen ice cream into a pie pan or a shallow baking dish. Aim for an even layer, roughly 1-inch thick. This initial hardening step is crucial for achieving uniform bar shapes. Place it in the freezer for at least 1 hour, or until it's very firm. Patience is your best friend here!
3.
Shaping the Bars: Once the ice cream is solid, use a round cookie cutter (about 2.5-3 inches in diameter) to cut out individual circles. A Pampered Chef measuring cup, as suggested by some home cooks, works perfectly if you don't have a dedicated cutter.
4.
Insert the Sticks: Gently but firmly insert a tongue depressor or popsicle stick into the center of each ice cream circle. Make sure the stick goes deep enough to provide stability but not so deep that it pokes through the other side.
5.
Secondary Hardening: Arrange your nascent Dilly Bar cores on a parchment-lined baking sheet and return them to the freezer for another 30 minutes. This ensures they are rock-hard, which is absolutely essential for successful coating. Any softness will lead to melting and a messy outcome.
For those venturing into healthier versions, the ice cream base can be crafted from Greek yogurt, peanut or cashew butter, maple syrup, stevia, and vanilla extract. This creates a thick, protein-rich 'ice cream' that freezes beautifully and provides a similar satisfying texture.
Mastering the Magic Shell Coating
This is where the magic truly happens, and often, where aspiring Dilly Bar creators face their biggest challenge. Achieving that signature crisp, crackable shell requires precision and speed.
Ingredients for Your Magic Shell:
*
Classic Chips: Gather your preferred melting chips: milk chocolate, semi-sweet chocolate, cherry chips, or butterscotch chips. These three are the classic Dairy Queen trio, and having them all ready allows for a delightful variety!
*
Coconut Oil (Optional, for smoother shells): While some chips melt perfectly on their own, a touch of coconut oil (especially for healthy versions) can aid in creating that 'magic shell' effect, ensuring a smooth, quick-setting coating.
The Melting Process:
1.
Separate Your Flavors: If making multiple flavors, separate your chips into individual microwave-safe bowls.
2.
Microwave in Intervals: For each bowl, microwave the chips for 30 seconds. Remove, stir well, and repeat the 30-second intervals until the chips are completely smooth and fluid. Be careful not to overheat, as this can cause chocolate to seize or burn. Stirring frequently is key to even melting. Alternatively, a double boiler method offers more controlled heating and can prevent scorching.
3.
Consistency is Key: The melted coating should be thin enough to pour and coat evenly, but not watery. If it's too thick, add a tiny bit of coconut oil (1 teaspoon at a time) and stir until it reaches the desired consistency.
The Art of Application:
This is the most critical step for perfect
homemade dilly bars. Speed and preparation are paramount.
1.
Prepare Your Station: Have a parchment-lined baking sheet ready in the freezer to immediately place the coated bars.
2.
The Pouring/Dipping Technique:
*
Working Fast: Grab your rock-hard ice cream bars from the freezer one at a time.
*
The Dipping Method: Dip the ice cream bar directly into the bowl of melted coating, swirling gently to ensure full coverage. The cold ice cream will make the coating set almost instantly. This is the most efficient way to get a uniform, thick coating.
*
The Pouring Method (Alternative): If you find dipping too challenging, or if your ice cream isn't perfectly frozen, you can gently place the bar on a piece of wax paper, then pour the melted coating over it, ensuring all sides are covered. This method may require a bit more cleanup of excess coating.
3.
The Signature Swirl: If you desire the classic Dilly Bar swirl, work quickly! Immediately after coating, take a spoonful of the melted chips and drizzle it over the bar in a swirl shape. It will harden almost instantly, creating that iconic look.
4.
Rush to the Freezer: As soon as each bar is coated, place it *immediately* back onto the parchment-lined baking sheet in the freezer. This rapid chilling is what gives the coating its crisp, crackable texture and prevents the ice cream from melting.
For those making healthy versions, the magic shell is often a mixture of cocoa powder, coconut oil, maple syrup, and sea salt. The coconut oil is the crucial ingredient here, as it solidifies rapidly when cold, creating that characteristic "magic shell" effect.
Tips for Flawless Freezing, Finishing, and Serving
Your journey to perfect
homemade dilly bars isn't over once the coating is applied. A few final steps ensure presentation and enjoyment.
1.
The Re-Freeze: Once all your bars are coated and back in the freezer, resist the urge to eat them right away! They need at least 2 hours to fully re-freeze and for the ice cream inside to become firm again. This waiting period is critical for the overall texture and stability of your bars.
2.
Trimming for Perfection: Sometimes, the coating can drip down the sides or form irregular shapes. To achieve that clean, Dilly Bar look, take a warm knife (run it under hot water and wipe dry) and gently trim off any excess hardened shell. The warm blade will glide through the chocolate smoothly, creating a neat edge.
3.
Storage: To keep your homemade dilly bars fresh and prevent freezer burn, store them in an airtight container in the freezer. You can layer them with parchment paper to prevent sticking.
4.
Serving with Joy: The final, and most rewarding, step: hand them out to happy faces on a warm day. The satisfaction of seeing someone enjoy your homemade creation is unmatched.
5.
Unleash Your Creativity: Don't stop at the classics! Consider adding sprinkles, chopped nuts, or other toppings before the coating fully hardens. You can also experiment with different ice cream flavors or create unique coating combinations. For more inventive ideas and to truly customize your creations, delve into
Recreate Classic Dilly Bars: DIY Dairy Queen Flavors.
Crafting
homemade dilly bars is an exercise in patience and precision, but the payoff is immense. That first bite into a perfectly crisp, sweet shell surrounding a creamy core is pure bliss. By focusing on a rock-hard ice cream base, mastering your melting technique, and working quickly with the coating, you'll be well on your way to churning out batch after batch of these delightful frozen treats. So gather your ingredients, clear some freezer space, and get ready to enjoy the ultimate DIY Dilly Bar experience!